Edit April 10th 2014 : New blog site is up and running now!! do come and see me at The New A Greedy Piglet
I am useless at website design. Behind the scenes, I have been trying to brighten up this site, and failing miserably. So I have moved us away from this WordPress design and I’m playing with a new design over on Blogger. It seems much easier to me, but I’d be interested to hear what my faithful readers think…
Make a note of the new address, I’ll be putting some of my favourite posts over there so we can find them quickly, as well as all the new things of course.
Is there anything from here you would like to see repeated there?
I have a husband who is half Italian, and whenever we went to Italy, we would always pick up jars of pickled vegetables, slightly sweet, in an oily vinegar. He loves them, but similar types bought over here have always been too sharp and vinegary for his taste. For years I have promised to try making them, and never got around to it.. but this year, for Christmas I made some. Oh they are good!
I used a mix of vegetables that included cauliflower, turnip, celery, red and yellow peppers, courgette and carrot. Here they are cut up nicely in their little bowls waiting to go in order into their vinegar bath:
I find it easier to keep them all separate so that I can add them to the vinegar bath in the right order – the carrot turnip and celery first, cook for a couple of minutes, then the cauliflower, one minute more and lastly, I added the red and yellow peppers and the courgettes off the heat. I like the vegetables rather on the crunchy side, if you prefer them a little softer then cook a little longer. The vinegar bath should be kept on a simmer rather than a full rolling boil as you don’t want to reduce it too much.
Importantly, don’t cool the vegetables in the hot vinegar, as they will continue to cook. Take them out with a slotted spoon and fill into sterilised Kilner jars, adding a bay leaf and a sprig of rosemary to each jar. When the vinegar is cooled right down to no more than lukewarm, then give it a stir and fill the jars covering the vegetables completely then seal. If you don’t have enough seasoned vinegar, top up each jar with plain wine or spirit vinegar. I keep them just on the shelf until they are opened, when I prefer to keep the jar in the fridge.
To fill 3 medium Kilner jars
250g each of carrots, turnips, red/yellow peppers, courgettes, celery, cauliflower cut into bite sized slices/pieces 500 ml white wine or cider vinegar 500 ml spirit vinegar(white or distilled vinegar in the US I believe) 100 ml olive oil 80g sugar 40g salt(I just use the cheapest salt as it is dissolved, try for one with no additives) One bay leaf and one sprig of rosemary per jar Three medium or four smaller Kilner jars, sterilised.
Combine the vinegars, oil, salt and sugar in a large saucepan and bring to a gentle simmer.
Add the vegetables starting with the carrots, celery and turnips. Cook 2 minutes. Add cauliflower and cook one minute more.
Remove from heat and add peppers and courgettes off the heat. Allow to sit off the heat for two minutes. Remove the vegetables with a slotted spoon and fill into kilner jars, making sure there is a good mix of different vegetables in each jar.
Allow the vinegar to cool to room temperature and then fill into the jars, completely covering the vegetables (if there is not quite enough vinegar to cover top up with more plain vinegar, either wine or spirit, whichever is to hand). Seal and keep for up to three months. Keep in the fridge once opened.
Eat with cold meats and cheese… or just nick bits straight out of the jar!
I’ve been meaning to pop some pictures on here of Thane Prince’s Cook Book Club November meeting…. Love Food in a Cold Climate , starring the luscious Signe Johansen who came wielding her waffle iron and a vat of waffle batter. Delicious.
If you are within reach of Islington, do check out if you are free around the first week of each month (might be Tuesday, might be Wednesday, depending on people’s commitments) , it is always a really good evening, everyone brings something to eat and something to browse through, and we talk food all evening to our continuing delight. Imagine! nobody glazing over with boredom, nobody trying to change the subject, nobody trying to watch the football……
We did a lot of nattering about Scandi things, it might have got a little political towards the middle, but we managed to rein the conversation in and get back to the food. Nobody brought anything smelly. Everything was delicious.
We had (and scarfed down wantonly) waffles maple syrup clotted cream Cornish butter rye crispbreads beetroot salmon mustard dill sauce tartiflette quince friands ginger cake limpe bread saffron buns more waffles and still more waffles…
If it looks great fun, it is because it was!
Roll on December, and A Novel Christmas… what on earth shall I bake that is from literature?
With huge thanks to The Draper’s Arms for their hospitality, Signe Johansen for her waffles and beauty, Thane Prince for her organisational skills and welcoming hostessness, Rodda’s Cream for their delicious cream and butter, Peter’s Yard for their crunchily amazing rye crispbreads and Flour Bin for their fab samples of British Malt and scrapers so we can all make Scandi breads 🙂 All much appreciated.
Do you remember the Gibassiers I made last year after Aldeburgh Food Festival, when I had them at Pump Street Bakery? I only make these in the wintry months, they don’t feel right in the summer, with all the berries around there are lots of other things to make, but once the nights draw in and the light fades, they come back into their own.
I didn’t want to bake something with chocolate in it, as I thought here would be plenty of that from other members of the group, so I decided on these little gibassiers which I thought would complement any chocolate that was around. I changed the flavourings from anise and citrus peel to orange zest alone. And left out most of the orange flower water , replacing that and the water with fresh orange juice. Really really delicious little bite sized morsels they came out.
Interesting point about the flour this time as well. I had popped into our local Romanian delicatessen earlier in the year, searching for the bottles of sour cherries that I know are popular in all the Eastern European countries, and in chatting to the charming Romanian owner, got to talk about flour for sweet yeast doughs. She recommended a 000 flour that was made in Romania, and is very very finely milled, and that she said was perfect for panettone. I didn’t get to make any panettone, but I do now keep the flour in just for brioches and buns like these. It has some additives that obviously affect the way the yeast reacts, but it makes a fabulous light delicate crumb. If you ever see it (I got my last lot in my local Turkish supermarket of all places) get it and try it and let me know what you think.
The recipe is slightly changed from before so I have copied it here and adjusted it for you – don’t forget it is a 2 day affair if you decide to give it a go:
Preferment:
180g bread flour (I used Dove Farm)
110g milk (I used skimmed milk with a fat slug of double cream in it )
half teaspoon Dove Farm instant yeast.
Mix all together thoroughly, leave covered tightly at room temperature overnight.
The following morning you will need the following ingredients :
Dough:
Liquid part:
3 x whole large eggs
Olive oil 80 g
80g Fresh squeezed orange juice (roughly the juice of one large orange, zest the orange first to use later)
1 tbs orange flower water (or just leave it out if you don’t have it)
Dry part:
400g oo or 000 flour (I used the Romanian flour above but if you can’t get it then any 00 flour or failing that, any plain flour)
100g caster sugar
7g (one tsp) fine salt
15g instant yeast or 30g fresh yeast – I have started to use fresh yeast these days in preference to instant, I think the crumb is softer. If you have a Sainsbury’s with a bakery section, ask them you should find they will sell you fresh yeast very cheaply, I pay 20 for 50g at my local Sainsbury’s.
Additions:
70g unsalted butter
finely zested rind of two oranges
120g melted butter
Caster sugar for finishing
Mix the liquids in a bowl and squish in the preferment. It won’t fully dissolve but will be easier to combine with the rest of the dry ingredients.
Combine the dry ingredients in a bowl and then add the liquid ingredients above. Now comes the fun part. If you have a stand mixer, then you can follow the instructions in the original Fresh Loaf recipe. If not then you will have the sticky fun of kneading it. I followed the instructions here for kneading a la Richard Bertinet.
and this one was also good and nice and close in.
You’ll notice that in both videos they added the butter in at the beginning. I haven’t tried it that way, though I guess there is no reason why it shouldn’t be fine. For this recipe, however, we are going to add the butter after the initial kneading, so expect it to stay VERY sticky for quite a while in the initial stages. Have a good scraper near you, a bowl of hot soapy water in the sink for emergency, and ignore the phone or the man at the door.
Once the dough is starting to come together nicely, after about 10 minutes of slapping, add 70g of room temperature butter cut into lumps. The recipe says to add it piece at a time, but I decided that this was going to add faff to faff, so it got added all in one go, but dabbed onto the spread out dough, as if making rough puff pastry, along with the orange zest. Then roll up the dough and squish and slap until you have a satiny smooth cushion of dough.
If you are using a stand mixer, I mixed for 4 minutes on medium speed using the bread hook, and then added the butter in four lots, letting the mixer incorporate each one before adding in the next and adding the zest in with the last lot. Then I mixed for a further 4 minutes on medium until the dough was very supple and shiny.
Drop the dough into an oiled container and cover tightly, bulk ferment for 90 mins to 2 hours until fully doubled.
Degas the dough by gently folding it in the bowl, remove from the bowl and scale into 35g portions. Shape each piece into a ball and rest covered for half an hour. Shape each little ball into a tiny batard, or torpedo shape. Flatten down and cut three slits in the sides of each piece Stretch them slightly as you put them on a parchment covered baking tray to proof. They should look roughly like this but without the slits in the middle – there isn’t room for the inner slits on the mini size. These in the picture are the bigger 60-70 g pieces that make full sized gibs, I love the tiny ones even better but make whichever size suits you.
Cover with cling film again, and allow to proof for another hour to 90 mins until very puffy and light looking. Glaze with beaten egg mixed with a little milk.
Preheat the oven to 400 F/200 C (350/180 for a fan oven) gas mark 6, and bake the buns for about 10 minutes until golden. Check the underside, you want that to be golden as well, but be aware if you cooking on a silicone tray liner that the bases are not likely to brown underneath, in which case turn them over for a couple of minutes.
I got 30 mini buns out of my mixture, so they were on three trays. The cooking is short enough that just cook the first two trays, swap them about half way to even the browning, and then cook the third tray.
Take them out and put them on a cooling rack with a sheet of parchment underneath. Brush both sides of the bun in melted butter whilst still hot, and then toss in caster sugar to coat. Put back on the rack to fully cool. They freeze beautifully, so don’t worry about having too many.
I keep enough out of the freezer for a couple of days, and heat them for about 5 minutes before serving as I like them best slightly warm, it brings the orange flavours out.
I do hope you give these a go if you haven’t yet, they aren’t difficult although there are a lot of stages to making them. But they are so good, they are really worth it!
I’m not sure.. did I mention that I am going to be one of the judges in the Essential Cuisine Risotto competition on Facebook and Twitter? And that means that I will be cooking the finalist risotti along with fellow judges Jeremy from Essential Cuisine, and fellow blogger Jenny from Rhubarb and Ginger? Because it is a cooking competition, a proper real cooking competition, and our job will be to judge the taste and texture by following the recipe provided to us by the contestant, cooking and judging their risotto. (There are some really good prizes to be won, and still time to enter – just pop a description of your favourite risotto on Facebook, and the Essential Cuisine chefs will decide on the finalists to be cooked and tastetested)
No sweat then. Just maybe a little practice to make sure that my risotto skills are up to scratch.
Well I will be applying the same rules. So let’s start at the very beginning. With a classic. Perhaps the simplest and oldest of all risotti, and a perfect accompaniment to lots of autumn braises and stews. A risotto Milanese.
This simple risotto, cooked in stock with saffron, can be found dating back to medieval times, in almost the same form that we eat it now. In 2007, the City of Milan recognized several Milanese products, including osso buco and risotto, with a Recognition of Communal Denomination (De.Co.).
The legend that Milan quoted as proof of the antiquity of risotto, is that it was created on September 8, 1574. It would appear that while the Cathedral Duomo Di Milano was being constructed, a Master Glazer, Valerio di Fiandra was in charge of creating the stained glass windows. Saffron was using in preparing some of the colors for the stained glass, and it would seem that one of his apprentices decided to play a practical joke, and added saffron to one of the rice dishes at a wedding feast, possibly the wedding of Valerio’s daughter. Everyone loved it, and Risotto alla Milanese was born.
Risotto alla Milanese is a simple dish, and isn’t usually eaten as a one dish meal, but as an accompaniment to rich stews and braises. One of the most traditional is Osso Buco , or Hollow Bone, which is a slice of veal shin cut across the bone, and slowly braised until soft and unctuous. It is a very delicious dish, savoury and yet slightly sweet from the Marsala and carrots and tomatoes in the sauce, and used to be extremely expensive and luxurious, a dish to be eaten in a restaurant rather than cooked at home. Now that English Rose Veal is more easily found, we can request this cut and enjoy it at home, as it is so simple to prepare if you are used to making an English stew.
Risotto alla Milanese (for 2 people)
Ingredients:
one shallot , finely chopped
30g unsalted butter
wineglass of white wine or dry Marsala
1 mugful of risotto rice (Arborio or Carnoroli)
3 mugfuls of hot chicken or veal stock*
6-8 strands saffron
further 30g unsalted butter
handful of grated parmesan
Put the stock into a saucepan, and keep hot on the hob.
Saute the shallot in the butter, very gently, until soft but not browned.
Add the rice and stir into the buttery shallots on a medium heat, toast until just starting to stick. Throw the wine or Marsala into the pan, and allow to boil fast until nearly evaporated.
Meanwhile, toast the saffron strands either in a metal spoon in a gas flame, or in a small pan if you are cooking with electricity. Don’t burn them, but they should turn a deeper burnt orange. Place in a small bowl and just cover with hot stock, leave to infuse.
Ladle the stock onto the rice, stirring from time to time over a medium heat. You don’t need to stir continually, just keep it moving so the rice doesn’t stick to the base, and so that the starches mix with the stock. Keep adding stock as it is absorbed. After about 15 minutes, you should be able to bite a grain of rice and see just a little white core in the middle. At this point add the saffron with its soaking water.
Keep stirring, adding stock and testing for another 5-8 minutes until the rice bites through with no white core, but it is still nicely firm and not stodgy, there should be enough stock left to make it a smooth slumpy mixture. If you run a wooden spoon through the middle you want a channel to appear that will slowly fill back, rather like jam. Remove from the heat.
Add the extra butter and cheese and beat quite fiercely until it is absorbed. Cover the pan and leave for 5 minutes for the butter and cheese to be absorbed.
Serve with:
Osso buco Milanese (2 people)
two thick slices of veal shin cut across the bone.
one finely chopped onion
3 finely diced carrots
3 sticks of celery, finely diced
2 cloves garlic finely chopped
one can or carton of chopped tomatoes, or three or four fresh tomatoes skinned and chopped
one wine glass of dry Marsala or white wine
approx half a pint of veal stock *
several stems of fresh thyme or half a tsp of dried thyme
an ounce or two of unsalted butter and a splash of olive oil
flour for dusting the veal
Chopped parsley to finish**
Lightly dust the veal with flour, and season with salt and pepper. Melt the butter and oil in a frying pan, do not let the butter burn. Seal the veal on both sides until golden brown, remove and place in an ovenproof casserole. Do not discard the butter/oil in the frying pan.
In the same pan, sauté the onion, carrots and celery until tender. Add the garlic half way through sautéing the vegetables. Deglaze the pan with the wine or Marsala, and the stock. Add the thyme and chopped tomatoes. Tip onto the veal in the casserole, cover with a lid or foil.
Cook in a moderate oven for approximately an hour and a half, until the meat is very tender when pierced with a fork. If the sauce is still quite liquid, then strain the liquid into a pan and reduce until it how you wish it to be.
Serve with the risotto, with chopped parsley sprinkled over. **
*I use Essential Cuisine stock powders, you can use home made stock, or any reputable cube
**Typically, the osso buco would be garnished with gremolata, which is raw garlic, parsley and lemon rind finely chopped together. This is also delicious, although a more assertive flavour, and I think can drown the delicacy of the veal. But it IS traditional, so by all means try it.
I am very happily experimenting with yeast baking. I love the slowness, and the sheer life of yeast dough. It comes alive under your hands, it is wonderful stuff.
Mostly, I have been baking savoury bread. Wet doughs like focaccia, dryer doughs like my milk bread, sourdough rye. I’ve been using a scald, overnight proofing, generally fiddling about. Anything rather than just bung the ingredients into the mixer and mix it up.
Playing about with the way the dough is made is interesting beyond measure. Each different stage allows the yeast to break down different parts of the flour, resulting in lots of flavour, sometimes a more robust texture, and sometimes a pillowy soft one.
One of the initial fiddling abouts I am very fond of is using a sponge. I talked about this in my Milk Bread tips, and I still think it is an easy way to improve simple breads. It is easily incorporated into any recipe, it is all just a question of proportions. Sometimes, I use a flying sponge, i.e. a short sponge, where half the flour quantity in the recipe, an equal weight of liquid, and all the yeast, are mixed and left for a relatively short time, about an hour and a half until there is lots of bubbling in the mixture and it is rising vigorously.
But recently, I have been extending the time that I am fermenting this sponge to around 6 hours when the dough has risen, and is now falling, and looking as though it has acne. The development of the gluten in this mixture is good and strong, you can see lots of stringy bits in the dough when you mix it into the rest of the flour and add any other ingredients and the remains of any liquid from your original recipe. The white bread I make as an everyday bread is stunningly good using this method.
So now is the time to use this method in a sweet dough. I have made some sweet dough but not a lot. I found making gibassiers very satisfying, and this recipe uses a preferment, which sits overnight and only uses a tiny amount of yeast, the remainder of the yeast being added in the main mixing.
I wondered if my sponge, using all of the yeast, would work, or if the retarding effect of the butter sugar and eggs would negate the benefits? I don’t have the science to explain what is going on, I can only try and see what works and what doesn’t.
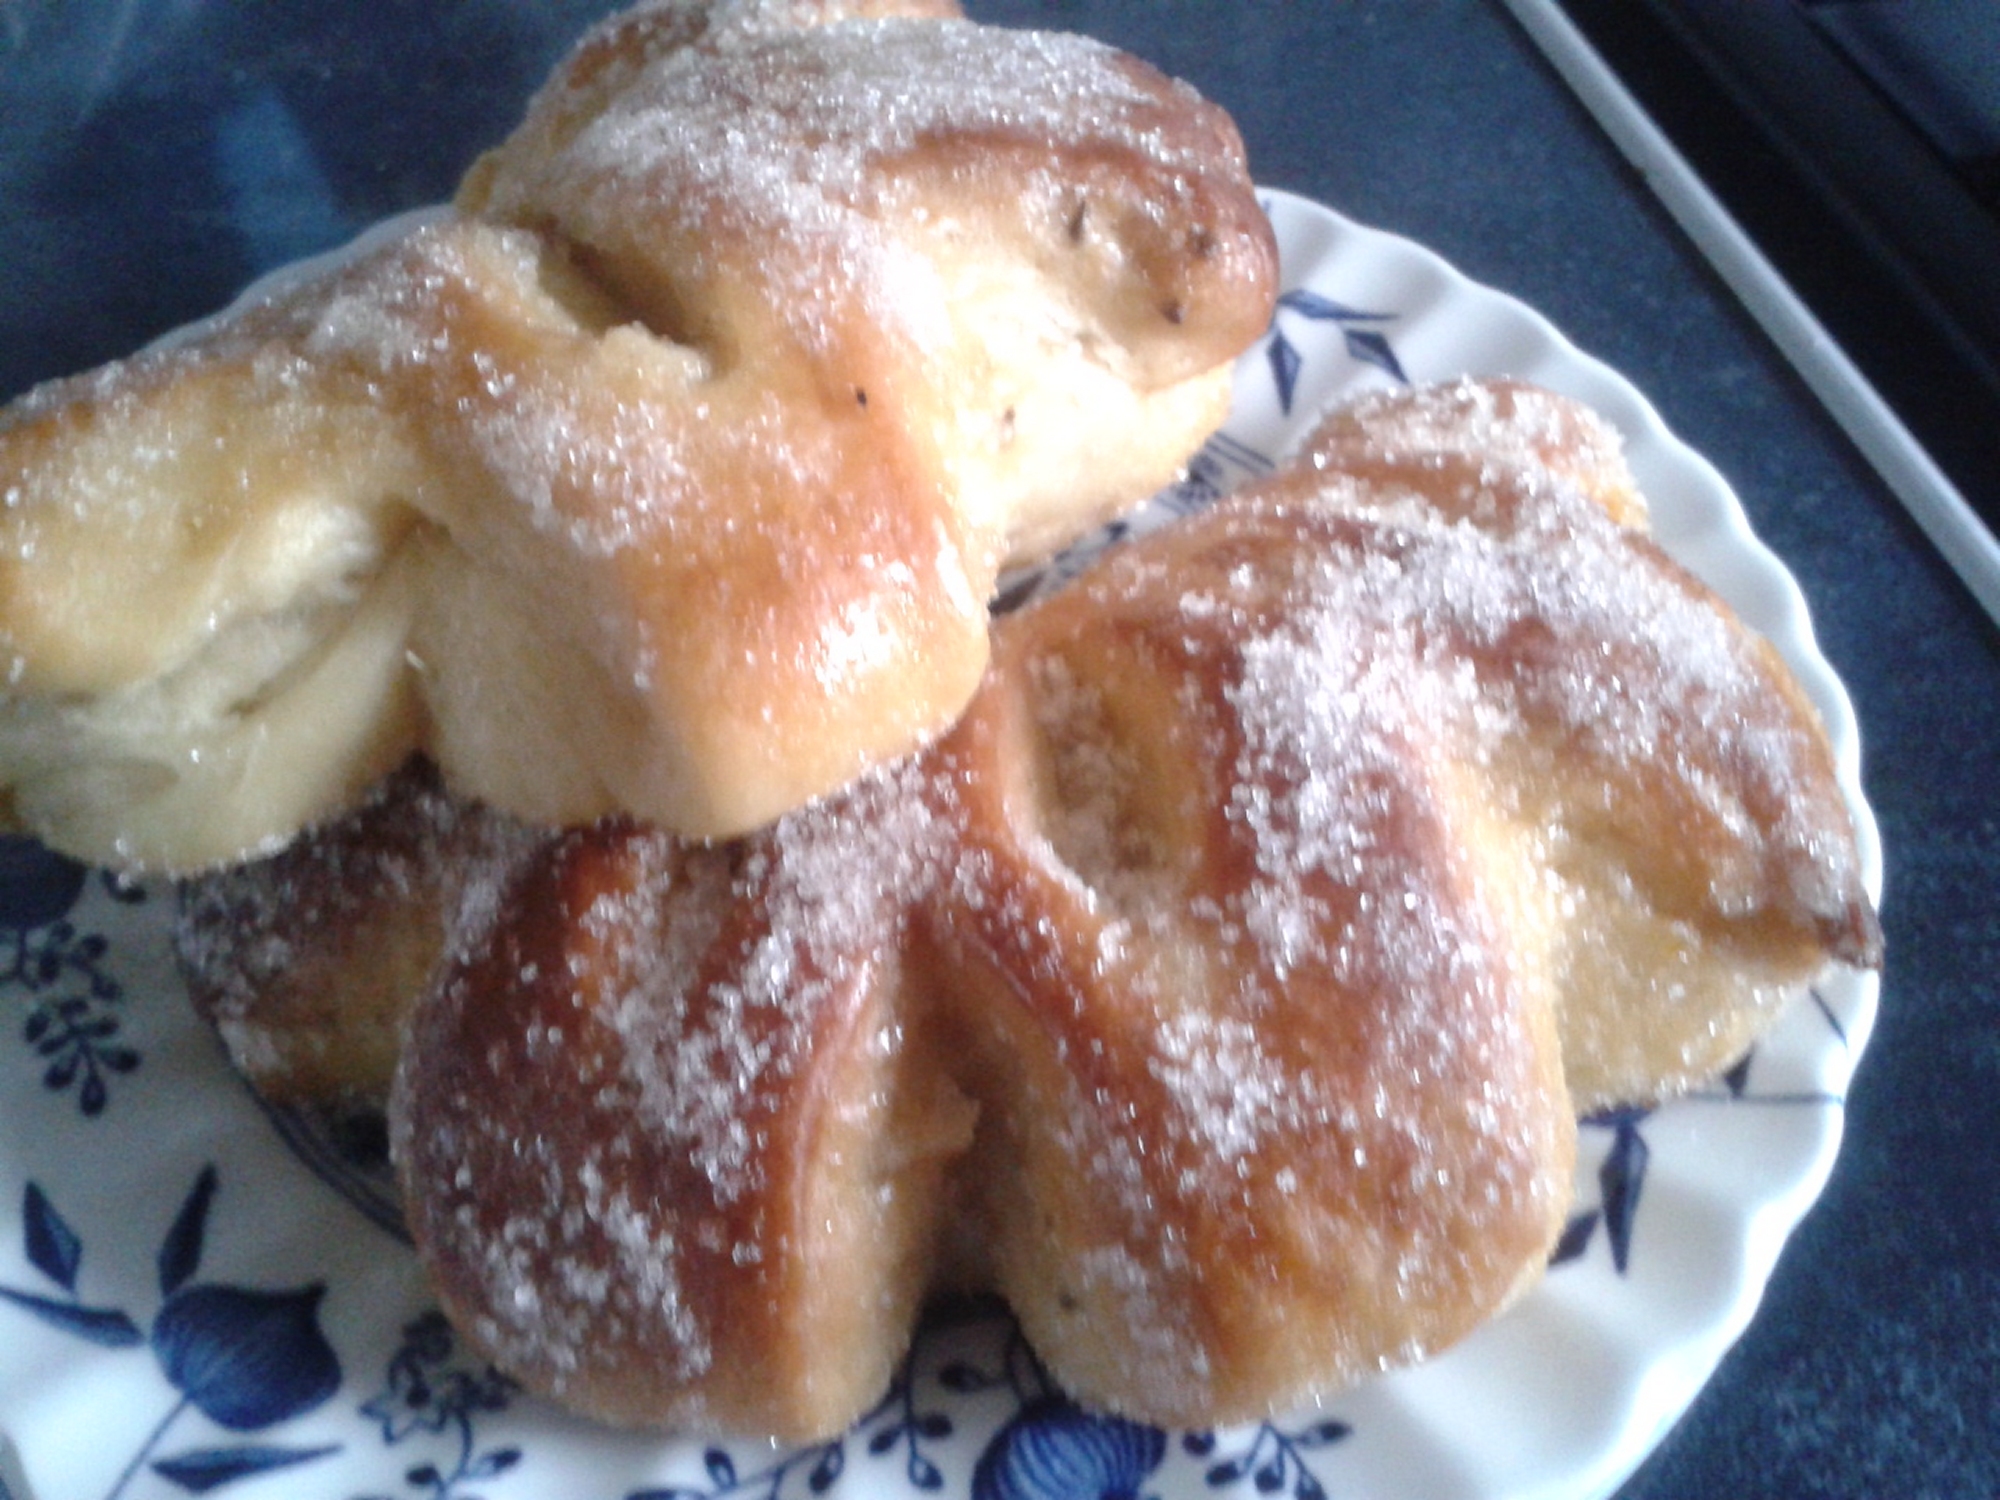
Well, I am pleased to say that it works fine. In fact, I think that it is a real improvement. The brioche type buns that I made are fluffy delicate clouds of delight, perfect with a cup of coffee in front of the computer
Very Light Enriched Dough Brioche Buns
This recipe is over 2 days, so start the sponge in the afternoon of the day before you want to bake, so that you can refrigerate the finished dough overnight to set the butter.
sponge:
125g Bread flour
125g whole milk, scalded and allow to cool to room temperature (do scald and cool the milk, it makes a lot of difference to the softness of the final dough)
1 tsp instant yeast
main dough:
250g Italian 00 flour
3 whole eggs lightly beaten
1 tsp salt
50g caster sugar
120g unsalted butter
Glaze:
one egg beaten lightly
sugar syrup
pearl sugar
First make the sponge by mixing the flour, milk and yeast together in a largish bowl. You don’t need to knead it just bring it together into a ball. Cover lightly with plastic and set aside for 4-6 hours. It will ferment and grow, and then will start to drop, you will see the rounded top start to sink, and lots of little burst bubbles appear on the surface.
Mix together the sponge and the 3 eggs, and stir until they are well blended. Then add the flour from the main dough, the salt, and the sugar. Mix this thoroughly for a minute or two, it will be very wet, but it shouldn’t be an actual batter. If it is a too wet add a little more flour.
If you are going to knead this by hand, and it isn’t difficult, just tricky and sticky, do look at this Bertinet method video . (This video will also give you a good idea of the texture you are looking for in the dough)
However, I am lazy these days, and use my Kenwood stand mixer (best thing I ever bought! ) with the dough hook on a medium speed.
Knead the dough until it is smooth and supple and coming away from sides of the mixer, just holding a little at the bottom. Then start to add the butter about 20g at a time, kneading in each piece until it is incorporated before adding the next. Mix at a medium speed until it is all in and there is no slapping noise of the butter on the side of the mixer.
Scoop the dough out of the mixer into a bowl about twice the size of the dough, tuck it in around the edges to make a nice smooth top, cover with plastic and into the fridge overnight. It will last for a couple of days in the fridge if you don’t have time to bake the following day, though it will continue to rise. If it overtakes the bowl, then just deflate it and cover it again.
When you want to bake, remove the dough from the fridge, and turn it out onto a floured board. Use a scraper to cut the dough into 12 pieces (or halve it, make 6 brioche and do something else with the rest). Form each piece into a neat round and drop it into a greased medium brioche mould (I have a silicone one with 6 moulds, but I think if I were buying from scratch I would sooner have individual metal ones. Allow to rise for 1-2 hours until doubled in size and very puffy.
Brush with egg glaze – I sprinkled with pearl sugar before baking, but the heat was a bit too hot for the sugar and it caramelised. Next time I will bake with the egg glaze to give a lovely brown top and then glaze with sugar syrup and pearl sugar afterwards to keep the little white sugary pieces intact.
Preheat the oven to Gas Mk 7, 425/220 and cook for 15-20 minutes. Turn out upside down onto a baking tray and give the undersides another 5 minutes (especially if you are using silicone which doesn’t brown very well. Cool on a tray and try not to eat all at once.
I am not sure how long these will last, I only made them this afternoon…. I will let you know!
I am very fond of rye bread. Both light rye, as you get in delis in NY and in French boulangeries, and also the darker Eastern European style of rye bread, deep in flavour with malt and caraway.
I discovered a rather excellent bakery in Westfield at Stratford, Karaway. They produce breads from Russia and it’s surrounding countries, and one that I tried and liked very much was a Lithuanian Scalded Rye.
I saw that Paul Hollywood went to visit them during his recent Bread series, and it gave some tantalising glimpses into how they made it.
Now, could I make something like that? I haven’t made sourdough bread for some time, though I had intended to a while back and so had some rye leaven sitting in the fridge. Time to work it up and get experimenting.
Now one thing that you must know about me is that I am useless at following a recipe to a letter. I am actually much happier with the kind of old fashioned recipe that says “add enough flour to make a soft dough..” or “mix until done..” You have to experience the feel of the dough and work to that feeling, not rely on quantities. I am very content with variables.
So I kicked off by estimating rough quantities based on an overall formula of 350 grams of water to 500 grams of flour.
I fed my rye starter up over a couple of days to end up with 200g of 100% hydration wholegrain rye leaven. In the morning of the bake, I mixed this with 100g of cold water, and 100g of Sharpham Park’s Bakers Blend (a very nice blend of wholewheat and white spelt, that I found in Waitrose. I like it very much so I do hope they don’t run out of it….) and left this sponge sitting at room temperature for 4 hours to start fermenting.
I wanted to use a scald, as that is supposed to help the rye starches to gelatinise and so make a sweeter and lighter bread. So how about 100g of rye flour (I am using Dove Farm Rye, as this is the only easily obtainable Rye around here) and 100g boiling water? oh no! far too stiff, so another 50g of boiling water went in. Plus a tablespoon of caraway seeds – I wanted them in the soaker so they wouldn’t be hard and nasty in my teeth. Much nicer porridge, so leave that for 4 hours alongside the sponge.
I shall need some malt. So 1 tsp each of dark and nutbrown malt powder from The Flour Bin (kindly sent to me as samples) mixed with a little boiling water and a tablespoon of honey. (Next time, maybe a little more malt to see how it affects the flavour. This amount I can’t taste, but it might be helping with the overall flavour anyway). Mix it up and pop on one side.
After the four hours were up, I put the sponge and the scalded rye flour (broken into chunks) in the Kenwood, and mixed them together. I added the malt, 1 and a half teaspoons of salt, and a further 250g of White Bread Flour ( Marriage’s Finest Strong White) . Mixed it (I can’t say kneaded it, it was more like mixing polenta to be honest…) using the bread hook for 4 minutes, then left it for 2 hours, folded twice, left another 2 hours, shaped and popped it into the fridge to rise overnight.
In the morning it was risen but also it had spread out. I should have used a banneton but I only have a round one, and I wanted a more torpedo shaped loaf. So I folded it to tighten it up a bit, and popped it onto a baking sheet covered in cornmeal.
I left it to relax for half an hour, whilst I cranked the oven heat up as far as it would go, and then added a pan of boiling water and the bread. Baked for 25 mins at full heat, then lowered the heat to Gas mk 5 375/190 for another 20 mins until the base was thoroughly cooked through. Out onto a rack and then LEAVE THE ROOM until it is quite cold. Actually, it probably could have done with leaving to the next day, but I am impatient!
It isn’t at all pretty. It suffered from not being proofed properly and so not being shaped properly. It could have done with a smoother tighter skin on it, and possibly with a glaze of starch of some kind. But cut, it has a lovely texture, lighter than you would think. And very delicious.
Do have a go. I am no expert, and this is such an experiment. Let me know how you get on, so we can compare notes…
In this year of the Queen’s Diamond anniversary of her coronation, I am thinking that I shall rename these modern Victoria Sandwiches as Elizabeth Sponges. Only one year to go to match Victoria’s reign, and my money is on her keeping on to make Elizabeth our longest reigning monarch of all time.
So, as it is her duty to reign over and look out for us all, so it is our duty to make lovely cakes and name them for her. Don’t you agree?
Here is my offering, delicious sponges flavoured with almond and vanilla, with vanilla buttercream and raspberry jam.
One of the things I am not so happy about with jam and buttercream in sponges is the way that a decent amount of jam can squelch out of the sides and make the cakes look messy. But if you only put a little bit of jam in, then the cakes can be dry and without any fruity softness inside. So how do you like this trick? I piped the buttercream round the edge, and popped a teaspoonful of raspberry jam in the middle. This kept the jam in place, and allowed for a nice deep filling. Neat, eh?
Here, look….
And then when you cut into the cake, you have it all tidied away inside. I reckon our queen would like a nice tidy cake.
These are simply gorgeous.. I found the recipe whilst wandering around on the net, and I couldn’t tell you how I got to it. But I am so glad I did. These are called “biscuits” by Giada di Laurentiis , who is an Italian American chef from the Food Network US site. Now Food Network US have the recipe, but it seems not the video , whereas Food Network UK have the video, where it is called Lemon Ricotta Cupcakes, but not the recipe… yeah, I agree, Nuts. Almonds mainly…. (ho ho ho) (Sorry.)
Well, I don’t call these biscuits, neither US nor UK verions, and they aren’t cupcakes to my way of thinking as they don’t have any buttercream on top. But they are ever so delicious muffins. So that is what I am calling them.
Here is the video showing you how to make them… sorry, Food Network don’t seem to want me to embed the video so you will need to visit the site. I hope this will work if you are outside the UK give it a go and let me know if it works.
As usual, I tweaked it a bit. I kept to the cup measurements so if you prefer grams I am sorry, when I make it again I’ll measure it up and put the metric version here too.
I made 12 in muffin cases
Tweaks:
I used half ricotta and half Total Greek 0% yoghurt
I added a half teaspoon of Lemon extract
Otherwise, surprisingly I stuck to the recipe. Delicious light and fluffy cakes, with the nuts on the top crispy. Definitely one to recommend.
I love cooking with yoghurt, and have been meaning to pop some of my favourite recipes here for a while now, so forgive me for suddenly popping several on at once.
These little cheesecakes I made using my straight sided mini Victoria Sponge tin, which I love very much. The cake size is perfect for individual cakes, and the straight sides give a better finish than using a sloping muffin tin. The nonstick coating on this tin is amazing too, no lining of the sides, and the loose bases just push up the cakes easily when they cool down.
I used Total Yoghurt Fruyo for these, it is already sweetened and so I didn’t add any extra sugar, but I think the recipe may need just a smidgeon. Not a lot, nowhere near as much as you would put into a normal cheesecake recipe. I also used part ricotta to lighten up the mix, (and because I had some in the fridge…)
The base is a mixture of ordinary digestive biscuits, some Lizi’s granola that I am liking at the moment, and a little bit of crushed Lotus biscuits to add a caramel flavour. The topping is just crushed Lotus biscuits on some and Lotus biscuits and granola on others.
I served these for dessert with some sliced strawberries and vanilla syrup (the kind you can get in bottles for making flavoured coffee – I find this very useful for desserts)
1 170 ml tub any fruit flavour Fruyo (I used peach this time, all are good)
100 ml double cream
2 eggs (medium or large)
1 tablespoon cornflour
1 teaspoon vanilla extract
juice of one lemon
Sugar to taste
Topping
crushed Lotus biscuits, mixed with granola if desired.
Method:
Mix all the base ingredients together and put one dessertspoonful in the bottom of each of the tin cavities. Press down firmly. Bake for 10 mins at medium temperature Gas mk 6/400/200. Remove and allow too cool slightly. Lower the oven temperature to Gas mk 4/350/180.
Using an electric whisk (hand held or stand, no matter) or a wooden spoon, beat the cream cheese and the ricotta until smooth. Beat in all the other ingredients, taste the mixture and add the optional sugar if you think you would prefer it slightly sweeter – it isn’t important to the structure of the cheesecake, it is purely for flavour. Don’t over beat, you don’t want too much air in the mixture, it should just be well blended and very smooth.
Using a small ladle, fill each of the tin cavities to about half a centimetre below the rim. Rap the tin on the table to knock out any air bubbles.
Bake for 20 minutes until there is just a little wobbly bit in the middle of the cheesecake. Remove and allow to cool in the tins until you see the sides shrinking away from the tin. Remove and allow to cool, chill if you like.
Sprinkle with topping crumbs, and serve with fresh fruit.
I found they lasted about 3 days happily in the fridge. They might have lasted longer, but they were all eaten by then!